

The BIRTH of a SUPER-HERO

Spider-Man began with a Christmas gift in 2016. I had always wanted to mosaic a mannequin and my wife was gracious enough to get me this bad boy directly from Amazon.


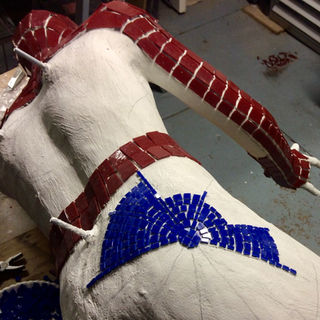
The hardest part about making a Spider-Man mosaic is that you cant buy a mannequin shaped like Spider-Man. In order to get the "Spidey" look, the mannequin had to be cut up with a jigsaw and then arranged in the position needed. Once the position was decided on, the individual pieces had to be re-attached and prepped for hanging on a display wall. Lag bolts were placed in both feet, the buttocks and in the back of the upper body. PVC pipe, metal brackets, and screws were used to attach the body back together.


Once the brackets and pvc were in place all the attachments were given an extra layer of adhesion by using a hefty application of liquid nails.


In order for the mannequin to have the perfect shape, foam had to be used. Foam was sprayed into all the open spaces, then molded to the required form. After the foam dried, it could easily be cut to just the right shape.


As I said before, mannequins do not come in Spider-Man shapes and that includes the hands. The conundrum was, "how do you get the hands to look like Spidey's when he is shooting his web and fully spread so he can cling to the wall?" In order to get the hands in the shape needed, we had to create our own. This meant creating molds and then pouring them and attaching them to the arms that were already available. Since Spider-Man is a teenager, I got lucky.....I happen to have one in my family. My son Nathan was the model/guinea pig. We used LifeCasting Alja-Safe Skin-Safe Molding Gel. I was a blast. It worked perfectly and Spidey's hands were exactly what i hoped they would be. Two weeks later, my son broke two bones in each arm and had to wear a cast from his fingers to his elbow for 5 weeks.


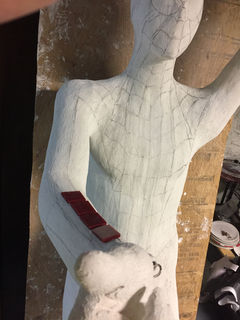
Once the hands had cured, they had to be attached to the arms. After the arms are attached, the rest of the body is able to be molded to the specific shape. The nose and ears of the mannequin had to be sanded off. Aluminum foil was folded and then covered in masking tape to fill in and raise up any spaces that need adjusting. The holes created for the placement of the lag bolts (after being filled with foam) were also covered in masking tape.
In order to ensure the sculpture is prepared to hold the glass, the entire mannequin had to be covered in plaster wrap. This material is cheese cloth impregnated with plaster. cloth is cut into thin strips then dipped in water. Once the strips are dampened they are placed over every inch of the sculpture. Spidey is then allowed to dry. Next a thin layer of thinset is applied over the entire mannequin as the final layer of preparation before the glass can be glued on Spider-Man.
and now
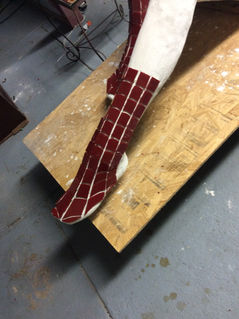
Cutting and placing the glass!!!!
The final step of the mosaic process is grouting. Grouting is also the scariest part for many mosaic artists. A huge amount of time is spent preparing the project, putting things on, taking things off, re-imaging the design, changing the pattern, and it all boils down to grouting. Once you grout, there is no turning back. For Spider-Man, I decided to grout with two different colors. For the blue glass, I chose a grey sanded grout and added a bright blue pigment. I made four different samples had several people help me chose the best one for Spidey. The biggest challenge was grouting the red glass. The classic Spider-Man look has dark black lines that create the look of webbing on the costume. Most black grout, when it dries, looks grey. I purchased a cobalt black pigment and mixed it with the black sanded grout which gave the desired look. After the grout dried, I used a hard plastic brush that attaches to a power drill to clean up any excess grout. The small areas that had minute grout deposits were cleaned with wooden popsicle sticks, dental tools, and tweezers.


